Commvault Unveils Clumio Backtrack - Near Instant Dataset Recovery in S3
Amazon RDS Operational Recovery Deep Dive with Clumio
Deep Dive into Clumio's AWS RDS Backup-as-a-Service: Unveiling Robust Data Protection Mechanisms
Clumio recently launched backup as a service for Amazon Relational Database Service (RDS). In this three-part blog series, we will dive deep into what this service provides through functional demos of the various protection mechanisms across different RDS databases. We will cover the following aspects, all of which are important parts of a disaster recovery strategy:
- Operational Recovery: This is the first order of protection, where we use AWS snapshots to backup and recover Amazon RDS instances within an AWS account. The AWS automatic backups of the db instance are taken every day, along with a backup of the logs, which capture changes or transactions, every 5 minutes. This enables full recovery or point in time recovery with an RPO of 5 minutes. Automatic AWS backup snapshots are turned on by default in RDS, but the settings can be adjusted.
- Extended Retention and Granular Record Retrieval: Organizations need to retain data for the long term to satisfy regulatory requirements, company policies, and SLAs for customers. This Clumio feature allows granular record retrieval from your tables without the need to recover the complete database. This service will be explored in detail in part 2 of this blog series.
- Rolling Backup: This is a time-lagged standby copy of your RDS database. Here the snapshot is moved out of your VPC, to Clumio’s secure storage. The rolling backup is an add-on feature that will enable you to do a full restore from backup if the production database is corrupted, or the AWS account is compromised. We will explore this in detail in part 3 of this blog series.
There are multiple options for managing your RDS snapshots, which may cause you to question the best practices. In this blog, we will discuss Clumio’s operational recovery capabilities. Operational recovery leverages AWS snapshots of db instances, and we can manage applying policies and performing recoveries with the AWS snapshots, right from Clumio. Many of our competitors call their operational recovery feature a snapshot manager, and they charge for it, whereas this functionality is free with Clumio.
What does this free tier allow you to do?
Whether you have just a couple, or hundreds of databases spread across multiple accounts, you can manage your Amazon RDS database AWS snapshots for free, all within the Clumio platform. As a database administrator, you can set up AWS snapshot policies and perform recoveries of the Amazon RDS databases in one place, rather than being overwhelmed by managing the protection of so many database instances, account by account. View the demo to see how easy and intuitive it is to manage Amazon RDS databases from the Clumio platform.
You can read this blog for more answers about snapshot managers:
Snapshot Managers Exposed; Announcing Clumio Backup as a Service for AWS RDS.
Figure 1 shows the overall operational recovery demo flow. First, we will show how to set up a unified policy in Clumio platform to configure the retention of AWS snapshots. In the next part, we will be doing a point in time recovery. I have used the PostgreSQL RDS database to explain the operational recovery feature.
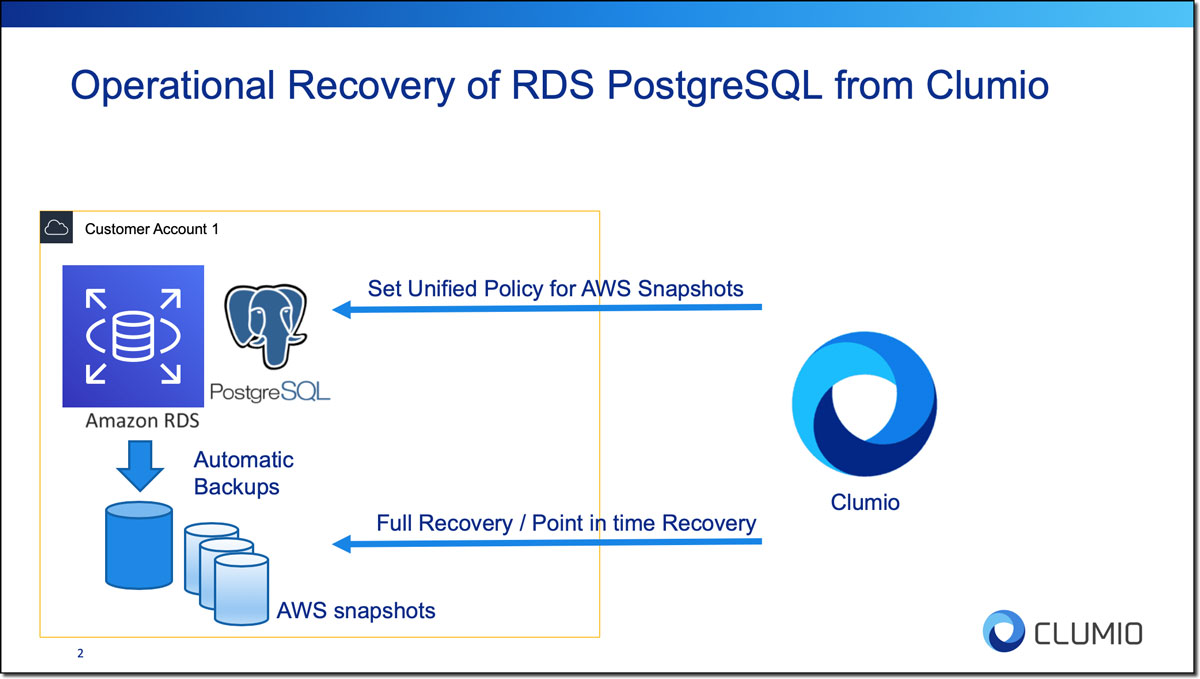
We use PostgreSQL in this example because it is free and the most popular open-source RDBMS. The PostgreSQL database version used in the demo is 12.2, and I have populated the database using native PostgreSQL load generator pgbench with 500 GB of data. The point in time recovery is shown using a reference table that has timestamp records. This reference table will help us understand the point in time recovery process.
Here is the full flow of the demo, which includes two parts
Setting a Unified Policy for AWS Snapshots
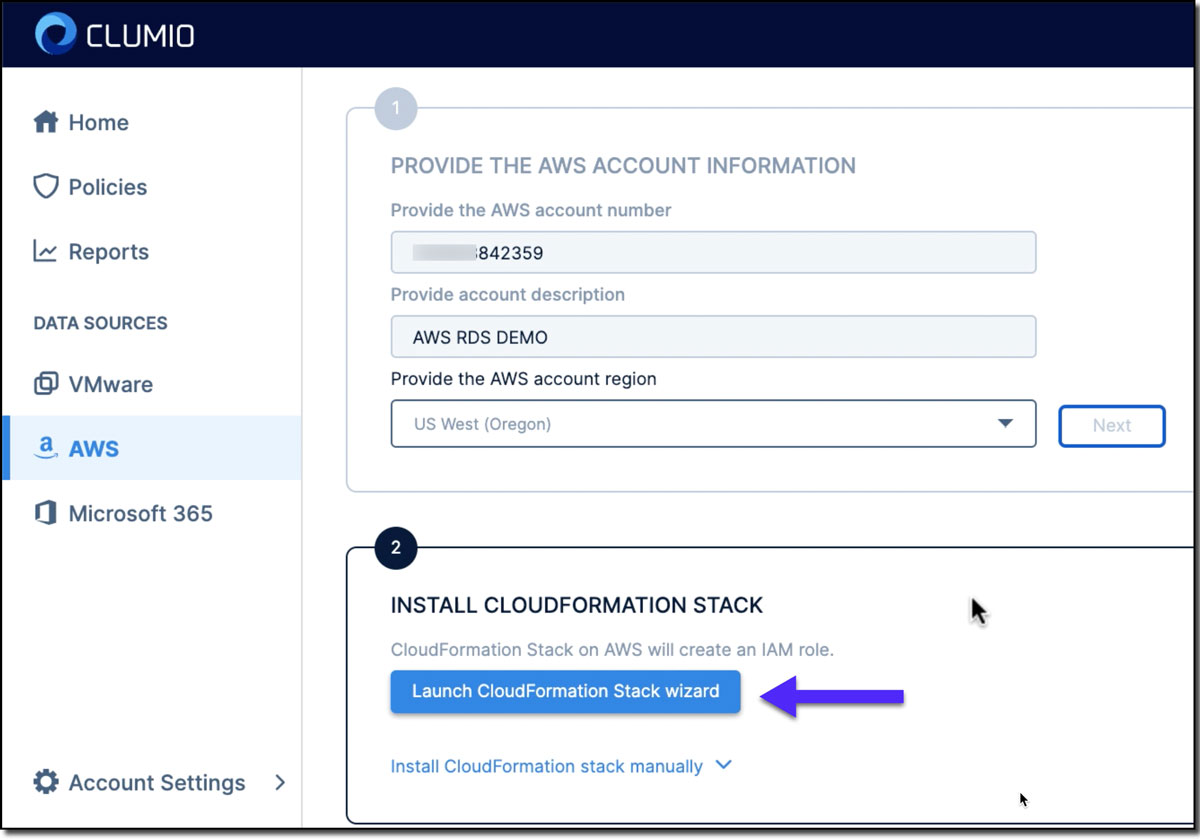
Step 1: The very first step is that we need to connect Clumio to the AWS account. The AWS account connection is done by deploying the Clumio service CloudFormation Template, which will enable Clumio services in your account (see Figure 2). It will take us to the AWS CloudFormation Stacks console where you can deploy the CloudFormation stack for Clumio with a single click.
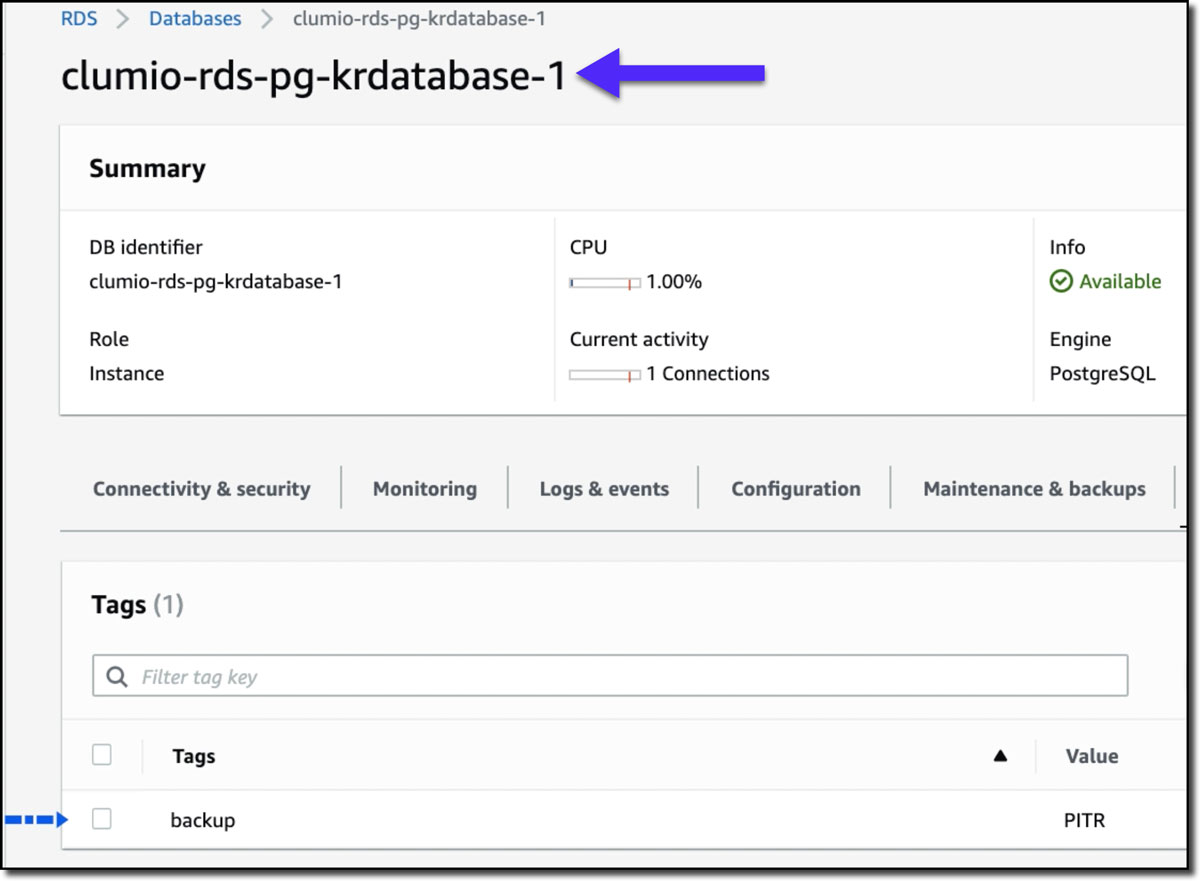
Step 2: In the AWS management console, we need to create and apply tags to RDS PostgreSQL, since Clumio uses tags to set up and enforce policies. For example, here we created the tag “backup” and value as “PITR”** for this PostgreSQL database (see Figure 3).
**We recommend creating generic tags like Clumio: Gold and not such narrow scope tags like PITR. Our policies are very potent, and one unified policy can work across multiple data sources like RDS, SQL Server on EC2, DynamoDB, S3, EBS, EC2, and Microsoft 365. Within RDS, one policy can enable operational recovery (point in time recovery), rolling backups and Granular Record Retrieval. Overly narrow tags limit our unified policies’ true potential.
Step 3: Now let’s create a unified policy in Clumio. A policy defines parameters of when data should be backed up and backup retention period, and allows you to define a single backup policy across multiple data source types. To set up the policy for RDS databases, we need to provide the AWS snapshot information like the retention of daily snapshots and when this policy should be applied (see Figure 4).

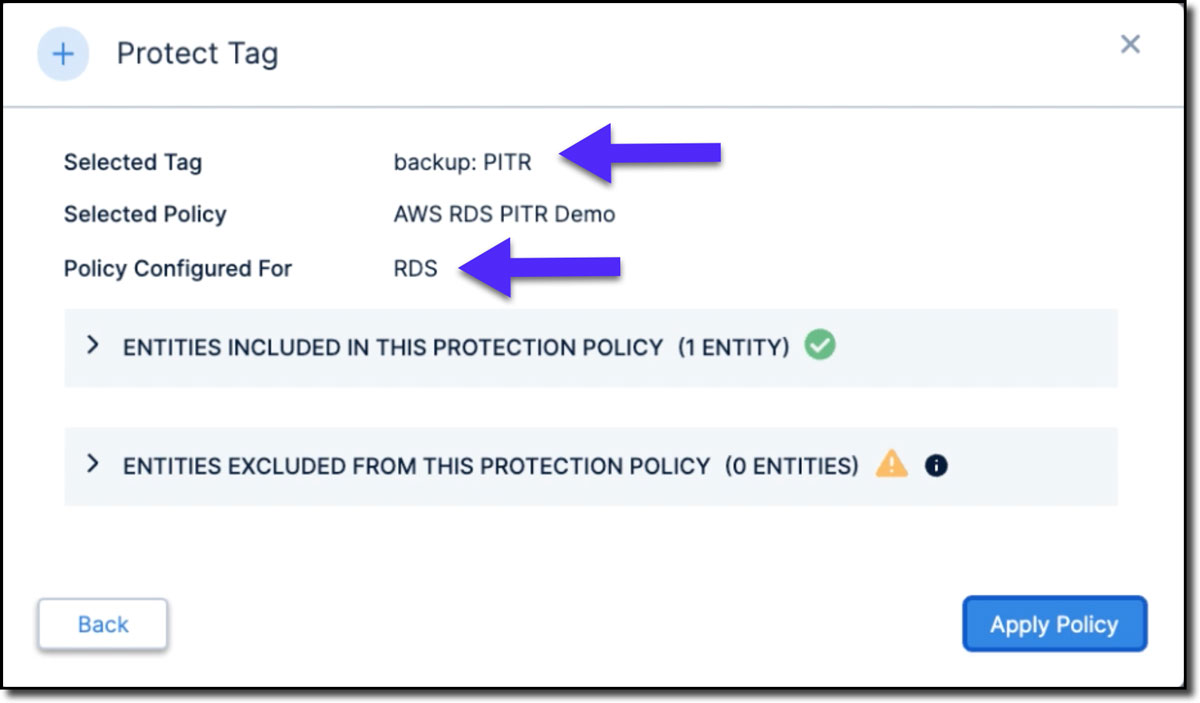
Step 4: We apply this policy to specific data through tags. Using tags makes it easy to apply and enforce policies at scale. Let’s select the tag to which we will apply this policy (see Figure 5). Once we have gone through these operations, we can check the RDS database in the AWS console and verify that the retention has changed as expected.
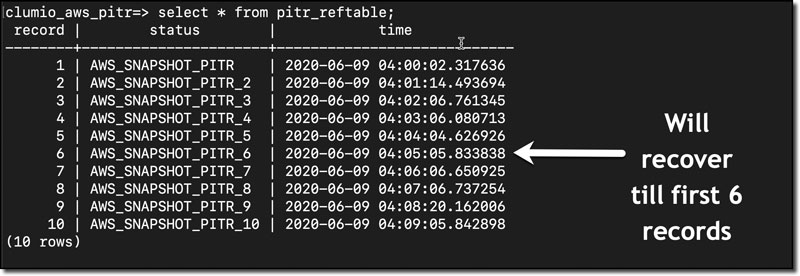
Step 5: Now, let’s take a look at the PostgreSQL database and locate the time stamps, which are in UTC format. We will do a point in time recovery for the first six records. Figure 6 shows the reference table in the AWS CLI.
Point in Time Recovery
Step 1: Within Clumio, we can go to the RDS database section and select the database we want to recover. This takes us to the recovery window to select the date for the point in time recovery.
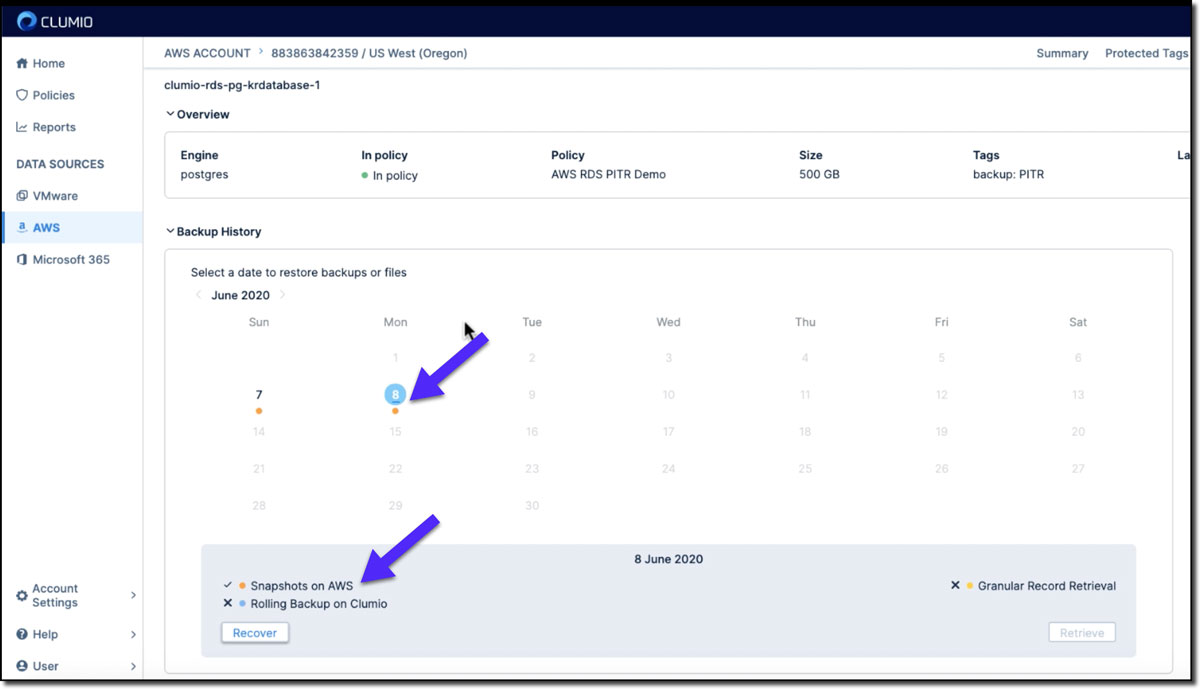
Step 2: In the calendar view, select the orange dots, which represent the AWS snapshots, and click recover (see Figure 7).
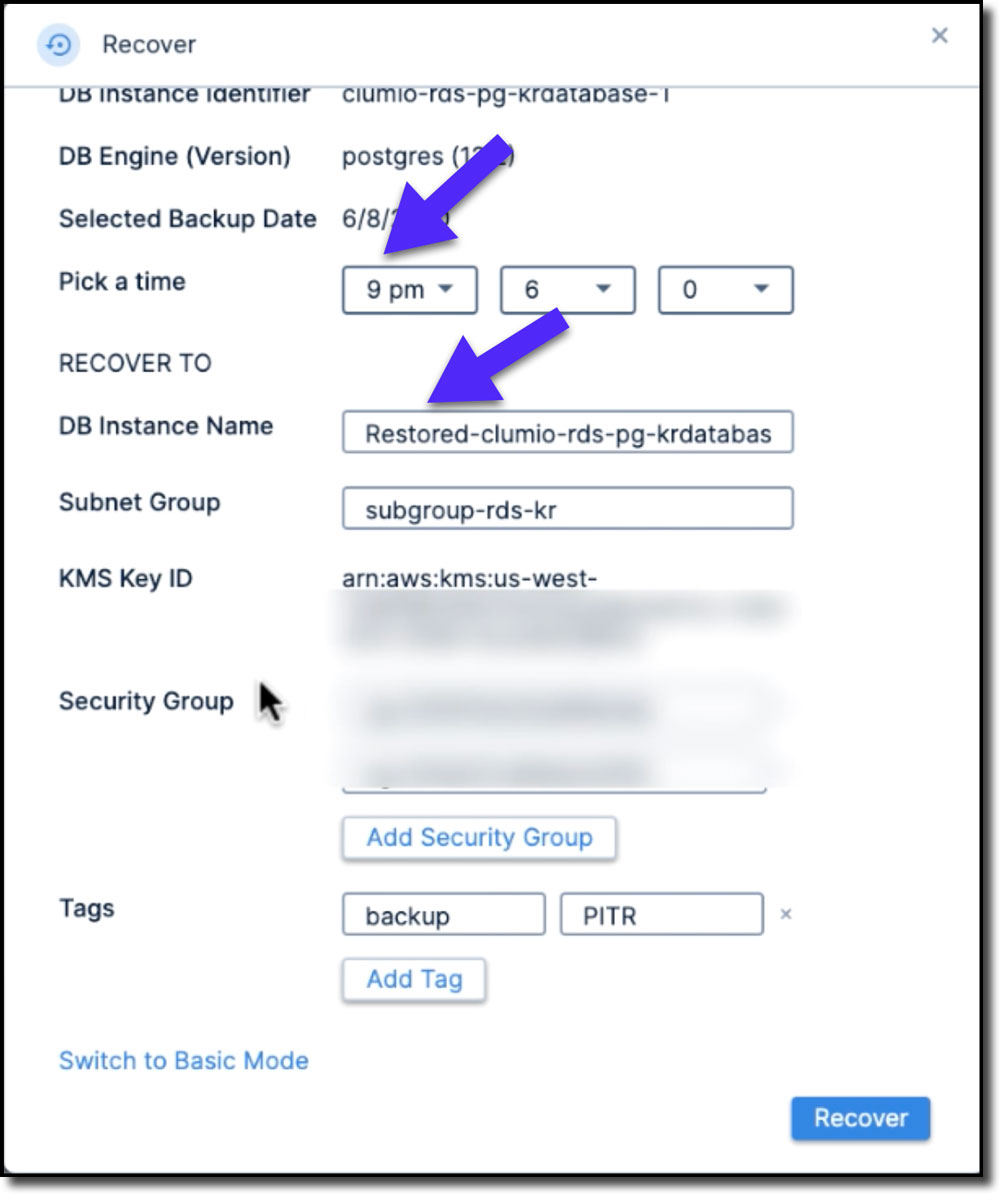
Step 3: Making sure that the local server time is converted to UTC, select the desired time to perform the point in time recovery. Here in the demo, since we would like to recover only the top six records, I will pick those times (see Figure 8).
Step 4: During recovery, the database instance name is automatically prefixed with Restored*, but we can change it to whatever name we want. We can also choose a connected AWS account and region to restore to. (see Figure 8).
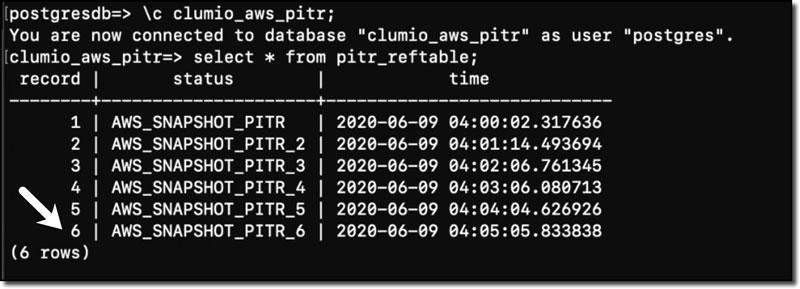
Step 5: Once the database is recovered, let’s access the database again and check the reference. As expected, it will have only six records (see Figure 9).
Watch the Demo
Effortless Amazon RDS Protection with Clumio: Try It Now!
As seen in the demo, it is effortless to set up Clumio Backup as a Service and use it to protect Amazon RDS databases. Clumio provides operational recovery via AWS snapshots free of charge, so we would highly recommend you try it out. Clumio will help you manage and protect all of your RDS databases across multiple accounts from a single pane of glass with just a few clicks.

